

A campaign to 500 subscribers and a campaign to 500,000 go through the same setup steps, whatever email platform you use. What changes is the cost of a mistake. On a small send, a stale opt-in field or an uncleaned list affects a handful of people. On a large send, the same mistake reaches the whole audience before the first report comes back, where it shows up as complaints, unsubscribes, and bounces.
Most of what decides how a high-volume campaign performs happens before anyone selects Send. If you know who has agreed to hear from you, what you want them to do, and how you'll judge the result, every later step has something to check against.
This guide walks through that work in the order a team runs it, using the Maropost Email Marketing Platform (Marketing Cloud) as the working example. It names the settings that matter on a large send, including the segment option that can include contacts who are not on a list, and the spam score that blocks a send. You will finish with a short review you can repeat before the next send, and a way to read the report after it.
How a large send is put together
Each step depends on the one before it. The audience is hard to choose without a goal, and the report is hard to read without one. The sections below follow Marketing Cloud's standard email campaign flow, from that goal through the report. Menu paths differ slightly between the Classic interface and Unified Navigation.
Set the campaign goal
What to have ready
- Objective: why this campaign exists
- Intended audience and the permission basis you are relying on
- Desired action: what recipients should do next
- Success criteria: a primary measure, guardrails, and a measurement window
- Audience source: the list, segment, or table you will use
- Content, campaign details, and sender information
Write the goal and the measure
Write the goal as one sentence that covers the objective, the audience, and the action. For example: “Help subscribed customers understand the new feature and get them to the setup guide.”
Then turn it into something you can measure:
- Pick one primary measure tied to the action, such as unique clicks to the setup guide.
- Add a few guardrails that would change how you read the result, such as unsubscribes, complaints, and bounces.
- Set a window and, if you have a defensible baseline, a comparison. For example: within seven days, compared with the previous similar campaign.
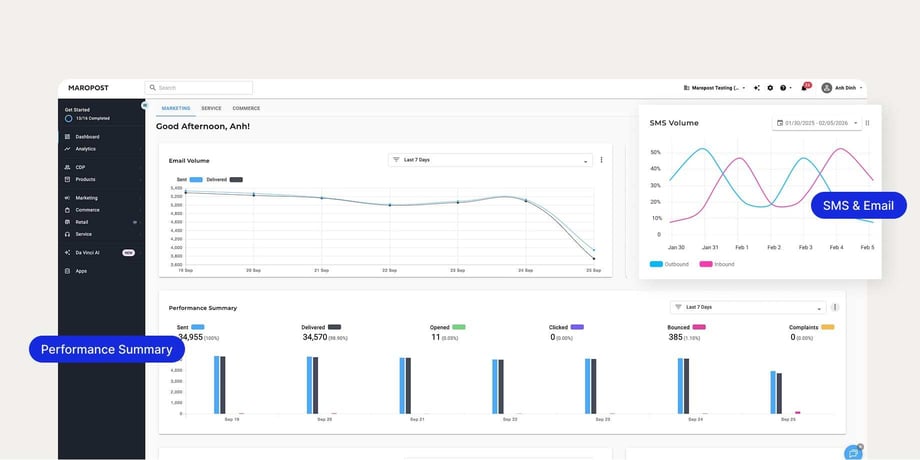
The campaign report Dashboard can show total and unique clicks, conversion rate, total revenue, complaints, unsubscribes, delivered email, and soft and hard bounces, along with opens. Choose the measures that match the objective. Conversion rate is total orders divided by unique clicks, and revenue is the sum of those orders, so both need product and revenue tracking in place. One-click cart integrations bring in order data but can't track campaign conversions. Web tracking can, though it is cookie-based and less accurate. The product and revenue REST API can too, if your team stores and passes the campaign ID.
Prepare the audience
Check subscription and permission
Start with people your organization has a valid reason to email. An import adds contacts and the subscription status you map. It is not your record of consent. How permission is obtained and documented depends on your organization’s policies and the requirements that apply to it. This is operational guidance, not legal advice.
Ways to add contacts in the contact screens:
- One at a time, with New Contact
- File Import, FTP Import, and Automated Import
Acquisition forms are a separate way to grow the contact database.
Before those contacts go into a campaign audience:
- Check your permission record alongside the contact’s current subscription state.
- Review opt-in values on manually added contacts. The "Opted in for Email notification" and "Opted in for SMS notification" boxes are selected by default.
- Confirm File Import mappings. Standard fields include name, email, phone number, subscription status, and contact tags.
- Keep hard bounces and unsubscribed contacts out of the send. Marketing Cloud adds hard-bounced contacts to the Do Not Mail list automatically.
- Decide what to do with inactive contacts. Maropost's deliverability guidance suggests removing addresses inactive for six to 12 months, or sending them a re-engagement email first.
Give someone on the team ownership of that review, and keep a record of who you excluded and why.
Choose a list or a segment
Pick the narrowest audience source that matches the goal and the permission basis.
| Use a... | When... | How it behaves |
|---|---|---|
| List | Membership in a stored collection is the audience | Changes when contacts are added, imported, or unsubscribe |
| Segment | Rules and conditions define the audience | Pulls the contacts who meet the rules each time it refreshes |
A segment used in an email campaign is refreshed when the emails are sent, so its audience reflects the rules at send time.
In the Next-Generation Segment Builder:
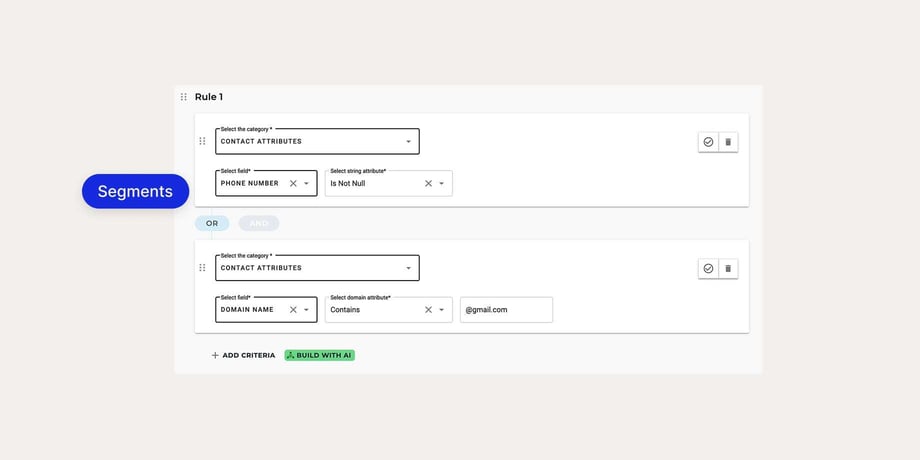
- Choose criteria that match the audience you defined. Categories are Contact Attributes, Purchase Activity, Campaign Activity, Membership, Relational Data, and Site Visits.
- Join the rules. Match All is on by default, which connects them with AND. Turn it off to include contacts who match any rule.
- Check the subscription setting.
- The Membership rule’s Lists option pulls active subscribed contacts by default and excludes Do Not Mail (DNM) and inactive contacts.
- Include all active contacts includes active contacts whether or not they are subscribed to a list, and it still excludes DNM contacts. Uncheck it to limit the segment to subscribed users.
A contact in a segment meets its rules. That is separate from your permission record, so compare the segment with your permission basis before you send.
Build the campaign
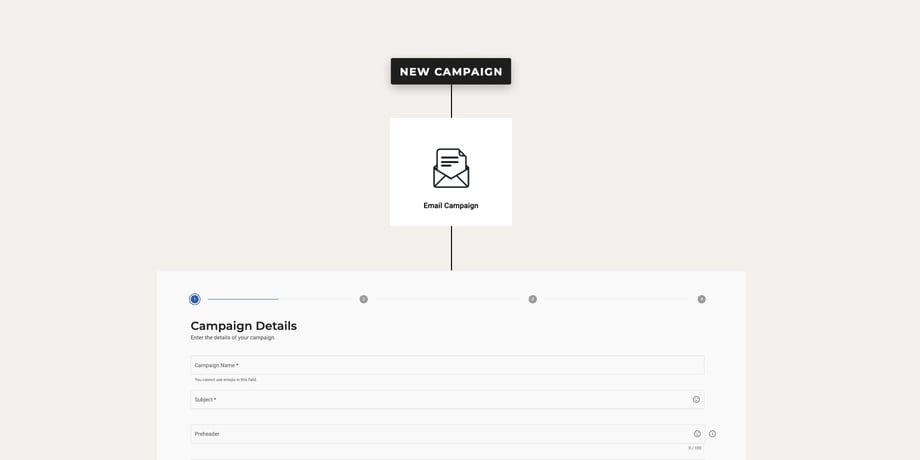
For a standard campaign, go to Campaigns > Email Campaigns, then Create New, then Email Campaign. An A/B campaign starts from New Campaign, then A/B Email Campaign.
- Campaign Details
- Required: Campaign Name, Subject, Address
- Optional: Preheader, Campaign Tags
- Contacts
- Select at least one list, segment, or table.
- Set From Name, From Email, Reply To, and Language. From Name and From Email fill in from the selected list and can be changed.
- Optionally associate a brand, which applies that brand's DKIM header and tracking domain.
- Optionally exclude selected lists, segments, or journeys from this campaign only.
- Content
- Choose content you have already prepared.
- Preview it with Show email preview link, Dynamic content preview, or Render Preview, then run Spam Check.
- Schedule
- Choose the send option and send a test here, then open Review. Those steps are in Check the campaign, then send.
Campaign-level exclusions apply to this campaign only. Do Not Mail lists and preference-management opt-outs are in the next section, and they need to be settled before the checks and the send.
Settle exclusions before the send
Review each control on its own. They do not do the same job.
| Control | What changes | Scope |
|---|---|---|
| “Unsubscribe me from all of my current email lists” | Removes the contact from those lists | List subscriptions |
| “Never email me again” | Adds the contact to the account’s Do Not Mail list | DNM status |
| General DNM | Suppresses sends to non-branded lists | This account |
| Brands DNM | Suppresses sends to lists for that brand | This account, separate from general DNM |
| Campaign exclusions | Leaves selected lists, segments, or journeys out of one campaign | This campaign |
| A list created with the Suppressed type | Keeps that list’s subscribed contacts out of a campaign | The campaign it is applied to |
For non-branded lists, general DNM stops standard campaigns, A/B tests, workflow campaigns, and test sends until the contact is removed from DNM. That same contact can still receive a send to a branded list, unless they are also on that brand's DNM list.
Contacts also land on the DNM list without anyone choosing "Never email me again." A hard bounce adds them automatically, and so does a click on the Report Spam link in an email footer.
The Manage Subscription page is where a contact chooses which displayed lists to join or leave. These controls support a permission-based process. Consent still comes from your records and the requirements that apply to your organization.
Check the campaign, then send
Run the pre-send checks
| Check | What it tells you | Limit |
|---|---|---|
| Render Preview | How the email looks across email clients and devices | Appearance only |
| Spam Check | The message’s spam score | The score has to be below 5 before the campaign can send. Recommendations appear when it is too high. |
| Test email | How the campaign arrives for a small group | Up to 30 recipients, sent from the Schedule step. It generates a Test Campaign Report |
| A/B campaign | How variations compare across split groups | A separate campaign type, with at least two groups. Groups can differ by content, subject, from name, pre-header, or send time |
Test recipients don't have to come from the campaign's own lists. In the A/B flow, those 30 can be up to 20 contacts from contact lists plus up to 10 typed addresses. The campaign audience itself is set in Contacts.
In an A/B campaign, any percentage you do not assign to a split group goes to the final group, which receives the version chosen by your winning criterion, such as highest open rate or highest click rate. If the split groups add up to 100%, there is no final send. Fix what these checks surface before the final review.
Choose how to send
On the Review summary, confirm this is the campaign you mean to release:
- Audience and exclusions
- Sender details
- Subject and content version
- Send option
| Option | What it does |
|---|---|
| Send Now | Sends immediately after review |
| Priority Send | Sends to the most engaged contacts first and moves the least engaged to the end of the queue, for better inbox delivery |
| Timezone Optimization | Delivers at the same local time in each contact’s time zone. Maropost also calls this One Time |
| Send-Time Optimization | Sends on the day or time each contact usually reads email, based on open history. Contacts with little history get the default schedule |
| Conversion-Time Optimization | Sends when each contact is most likely to buy, based on purchase history. Maropost recommends it for eCommerce promotional campaigns |
| Recurring | Sends on a repeating schedule |
Pre-Send Calculation prepares the audience three hours before send time. It is useful for large or complex segments. In the A/B flow, the campaign has to be scheduled at least three hours ahead, or enabling it returns an error. Editing locks at the campaign level once calculation starts, though content that is already selected can still be changed in the content editor.
Read the results
Open Email Campaign Reports from Analytics > Campaign Reports or from the Email Campaigns index. A standard report has four tabs: Dashboard, Overlay, ISP, and Details.
Where to look:
- Dashboard. The measures you chose when you set the goal, including opens, clicks, revenue, complaints, unsubscribes, and bounces. Read revenue and conversion only when product and revenue tracking is set up.
- Details. The lists, segments, and tables used, with contact counts, and the settings applied, such as Send-Time Optimization or One Time.
- ISP. Delivery and response for the top 25 ISPs on this send.
- Deliverability Report. A separate custom report. You choose the ISPs and the metrics, such as open rate, bounce rate, and complaint rate.
- A/B Campaign Reports. Test groups side by side, the winner under the criterion you set, and sent, open, click, and click-to-open.
- Test Campaign Reports. Generated when you send a test email from the campaign builder, with the same tabs and metrics as a campaign report.
How to read them:
- Start from the objective and success criteria you wrote before setup.
- Read the measures together. Clicks show response to linked content. Delivery, bounces, complaints, and unsubscribes show how the audience and the send held up. If bounces look high, the ISP tab shows whether most of them come from a single provider, and the soft bounce detail lists each bounce code.
- Treat opens with caution. Mail privacy protection can record an open without confirming that a person read the message. The open and click detail reports show whether the event came from a data center, include an Exclude Data Center Events filter, and show Apple Mail Privacy Protection status.
- Keep test results in their lane. An A/B winner belongs to that test. A test-send sample belongs to those recipients.
Use the same report to decide the next campaign:
- Compare the results with the original objective.
- Review several signals next to the audience and settings on the Details tab.
- Write one hypothesis that might explain the pattern, and label it as a hypothesis.
- Change a limited number of variables in the next campaign.
- Measure that result against the same criteria, then keep, revise, or drop the hypothesis.
A high-volume campaign uses that same sequence. What changes is the cost of skipping a step.
Before the next large send, repeat this review:
- The goal sentence and primary measure are written.
- Permission for the audience is confirmed, and exclusions are settled.
- Preview, Spam Check, and a test send are done.
- The Review summary matches the audience, sender, content version, and send option.
Keep the goal sentence with the report, so the following campaign starts from what this one showed.